Backlog’s user access basics every administrator should know

Backlog Staff
August 18, 2020
When using Backlog for your projects, you may wish to add members from other departments or external partners (e.g. vendors, freelancers, clients) to your project. To help you manage your projects securely, we’ll use this article to introduce some user access basics:
Three basics of user privileges that administrators should know:
- ‘Member/Guest’ versus ‘Administrator’
- Appointing a member as ‘Project Administrator’
- Further user restrictions: “Add issue only” or “View only”
Three patterns to apply information/project access:
‘Member/Guest’ versus ‘Administrator’
Let’s begin with the differences between Member, Guest, and Administrator roles.
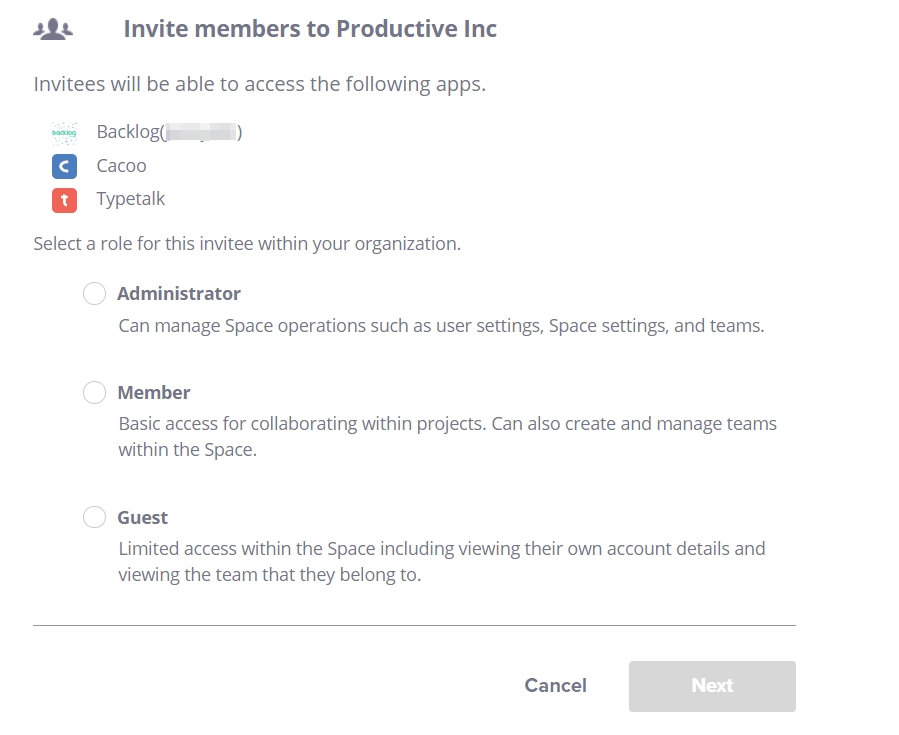
- Member: Project members have access to the information in their participating projects and they can collaborate using the available features under their Backlog plan, e.g. Issues, Boards, Files, Git, Wiki, Gantt Chart, etc.* If a user is not a member of a project, they will not be able to access that project.
- Administrator: Besides having member privileges, Administrators can manage the Space and add users via the Space/Organization settings. Administrators can also create/archive projects, and manage members in projects.
- Guest: Guests can operate and use Backlog features (Issue, Wiki, Files, Repositories, etc) just like members, unless restrictions are put on their account by the Administrator.* However, the main difference is guests are prevented from viewing the organization’s member list. They cannot view other teams in the organization, nor members of those teams, but they can view the team they are in (if any), and its members.
*Administrators can further restrict members’ and guests’ actions to “add issue only” or “view only” within the Space; this will be introduced below.
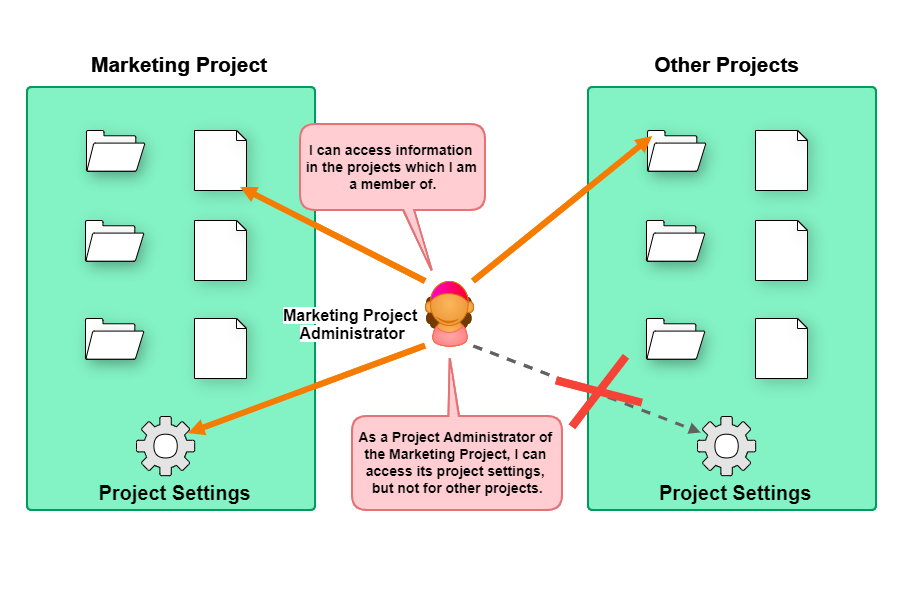
By understanding that members can only access and collaborate within their participating projects, we can plan how to set up a project and its members so that information is secure and visible only to relevant users.
Use Case: A company with multiple departments
For a company with multiple departments, e.g. IT, HR, Sales, etc, each department can create their own separate projects. This way, only department members can view and collaborate in their projects, and information access is controlled.
Additionally, staff can focus on their relevant tasks and issues without being distracted by another department’s work.

| What you want to achieve: | To control or limit information access to relevant users only, and minimize any potential information leaks. |
| What you can do: | Create projects for different departments, teams, or work projects, and add members to give them access. If you have an external partner like a freelancer or your client and you wish to keep your list of organization members private, you can add them as guests. They will still be able to use normal Backlog functions like Issues, Wiki, and Git. |
| Useful links for more details: | Manage organization users and teamsManage project members and teams |
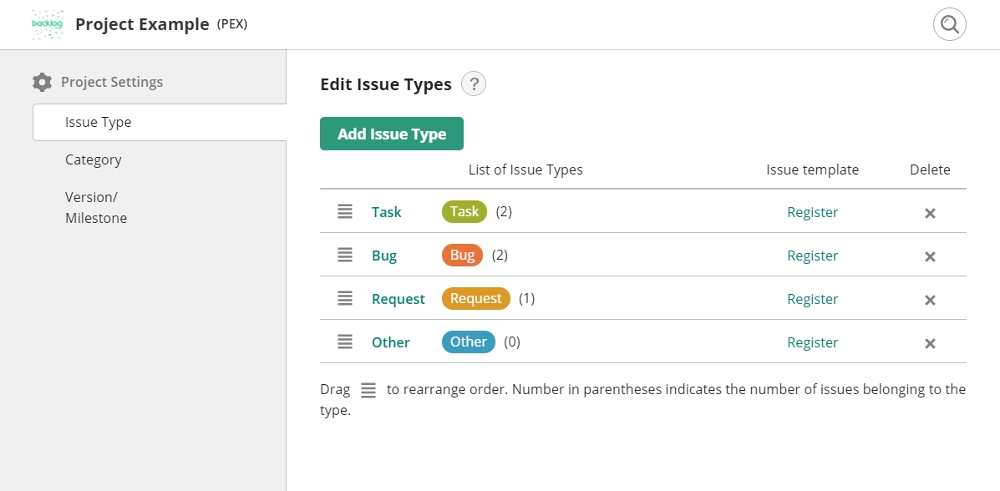
Appoint member as ‘Project Administrator’
A Project Administrator is a user with the added privilege to administer or manage a project.
With more users and projects being managed in Backlog, it can become difficult for the administrator to manage who is involved in which projects. In situations like this, the administrator can delegate a member to manage the project by assigning them as a Project Administrator.
As a side note, guests cannot be assigned as Project Administrators.
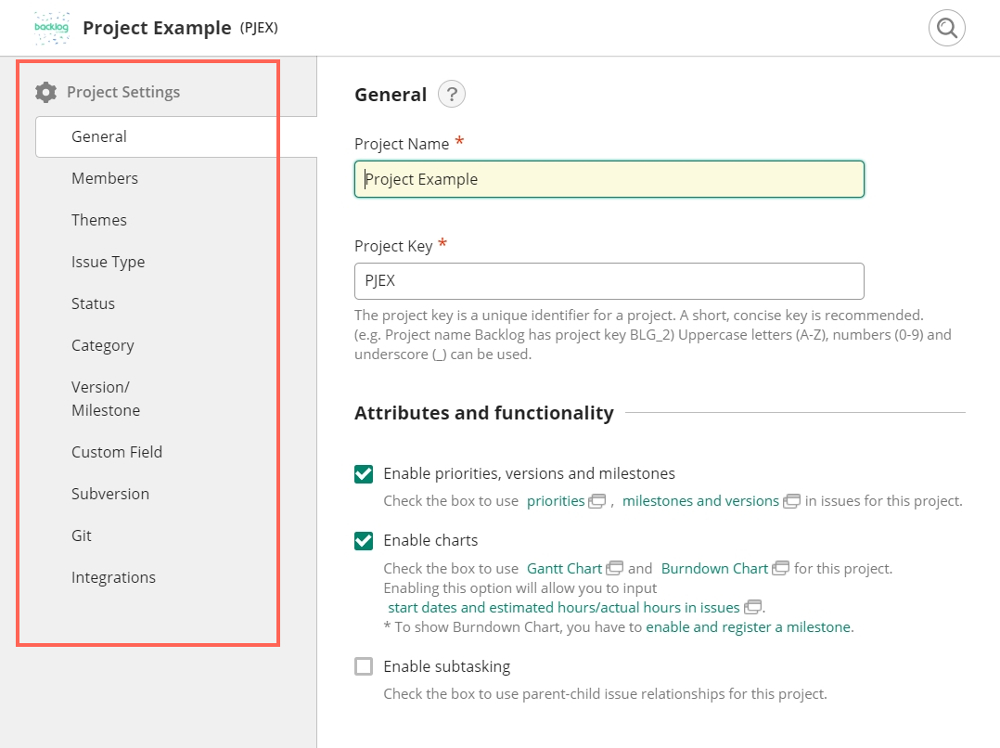
Project settings that can be accessed by members:
Project settings that can be accessed by project administrators:
Use Case: Delegating project responsibilities to other members
For department or project managers, you can add them as a member and assign the Project Administrator title and privileges, so under their own initiative, they can manage their respective projects and project members.
| What you want to achieve: | To delegate project management responsibilities to other users — e.g. project or department managers — within their respective projects. |
| What you can do: | First, create a project or use an existing project. Then, assign a member as the project administrator, so they can add/manage project members and adjust the project settings accordingly to fit the project’s needs.
Note: Project administrators can only add existing users to projects. To add new users to the Space/Organization, the project administrator needs to have inviting privileges. This can be granted to project administrators and members under Organization Settings. |
| Useful links for more details: | Manage project members and teamsGrant a member inviting privileges |
Further user restrictions; “Add issue only” or “View only”
To further restrict the actions a user can perform in the Backlog Space, you can set restrictions such as “Add issue only” or “View only”.
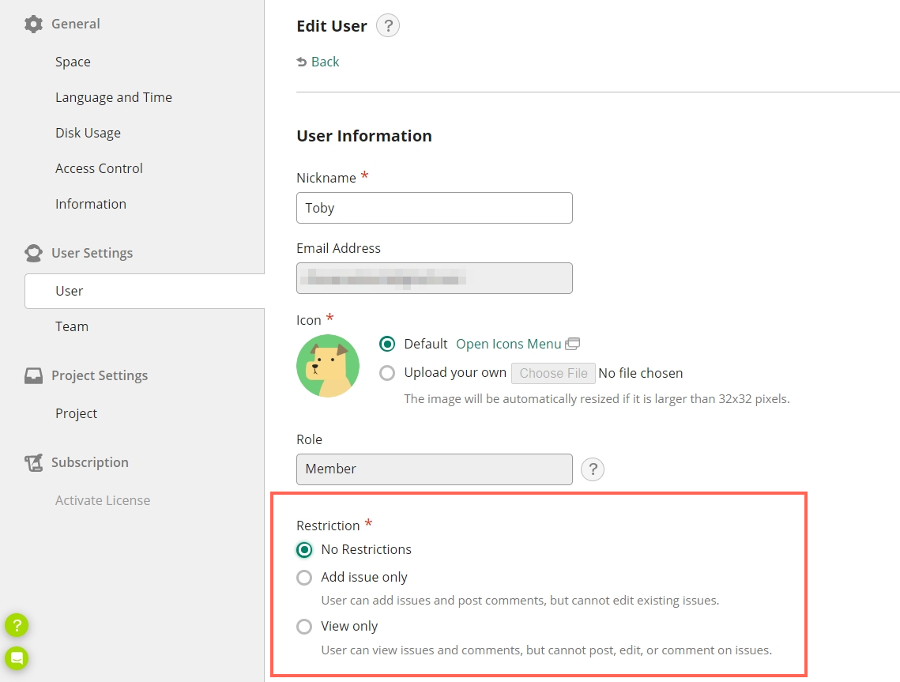
Add issue only: Users can add issues and view/post comments, but they cannot edit issues. They can view Board, Wiki, and Gantt Chart.
View only: Users can view issues and comments, but they cannot post, edit, or comment on issues. They can view Board, Wiki, and Gantt Chart.
Table of permissions for “Add issue only” and “View only”:

Use Case: External users
For example, you might be working with a client or vendor on a project, and you wish to prevent them from accidentally changing or editing the issues in Backlog, you can set up these user restrictions.

| What you want to achieve: | To restrict a member’s or guest’s actions in the Space and projects so they can’t accidentally change or edit an issue. |
| What you can do: | After inviting the user as a member or guest to the Space, you can further restrict their actions to “Add issue only” or “View only”. |
| Useful links for more details: | Further Restrict User Permissions |
Three Patterns for information and project access
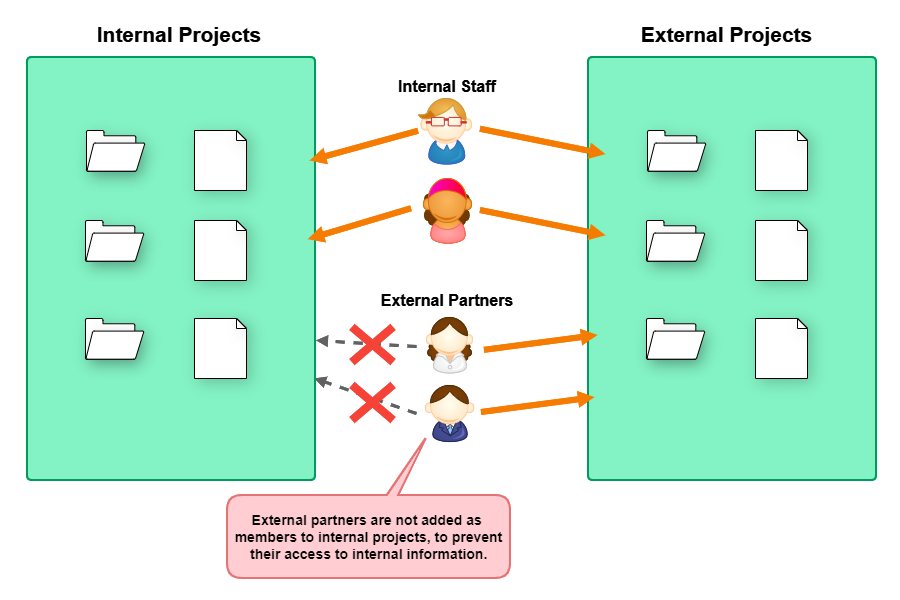
Pattern 1: Internal / External projects
If you are planning to use Backlog with many members or external partners, consider dividing the projects into “internal/external” projects.
As introduced above, projects can be separated based on departments (like marketing, support, development, etc). This is effective for controlling user access to information and can also be applied to joint projects with members of other departments or customers.
For example, we can consolidate interactions with external partners in an external project, while internal coordination and research are carried out in an internal project that’s only accessible by relevant team members. This way there are no worries about confidential information leaking outside of the team. Since information is kept organized in both internal and external projects, we can still track our issues and tasks smoothly.
| Scenario: | Working on a project with external partners or customers. |
| Usage pattern / recommendation: | Consider splitting the project into internal and external projects so that confidential work or research information is accessible only by team members or internal members. In the external project shared with customers, you can also consider adding further restrictions on specific users, such as the “Add issue only” or “View only” restrictions introduced above. |
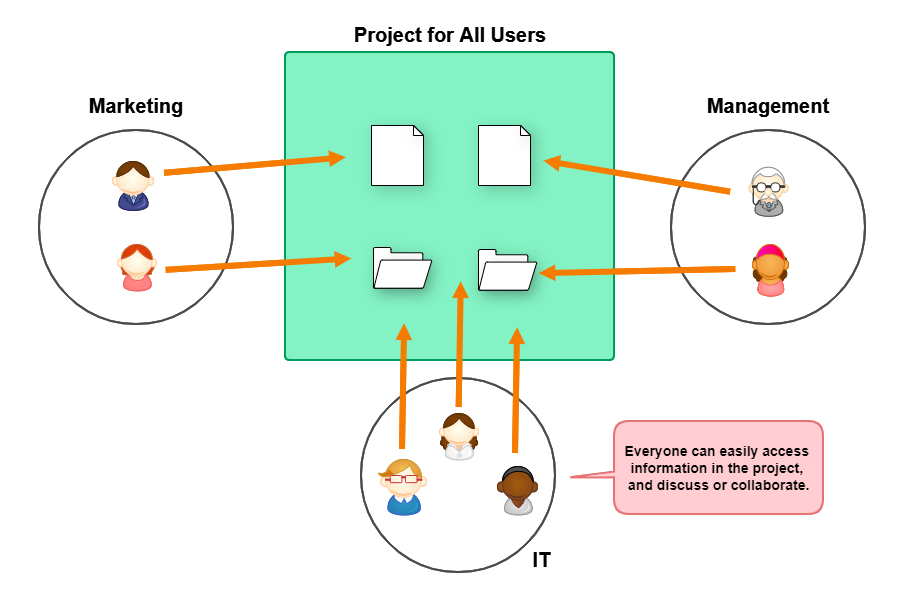
Pattern 2: Project for All Users
Although it’s important to limit user access on a per-project basis, there are also situations where we want to communicate work information and issues to all users in the Space. In this case, it’s best to create an all-users project.
By having a project in which everyone can participate, you can inform everyone about important updates, discuss work in issues, share Wikis, files, etc — to ensure that information is communicated smoothly within the organization.
| Scenario: | To have a common place for sharing information to all users and all users can communicate and share information smoothly. |
| Usage pattern / recommendation: | Create a project and add all users in the Space as members so everyone has access. |
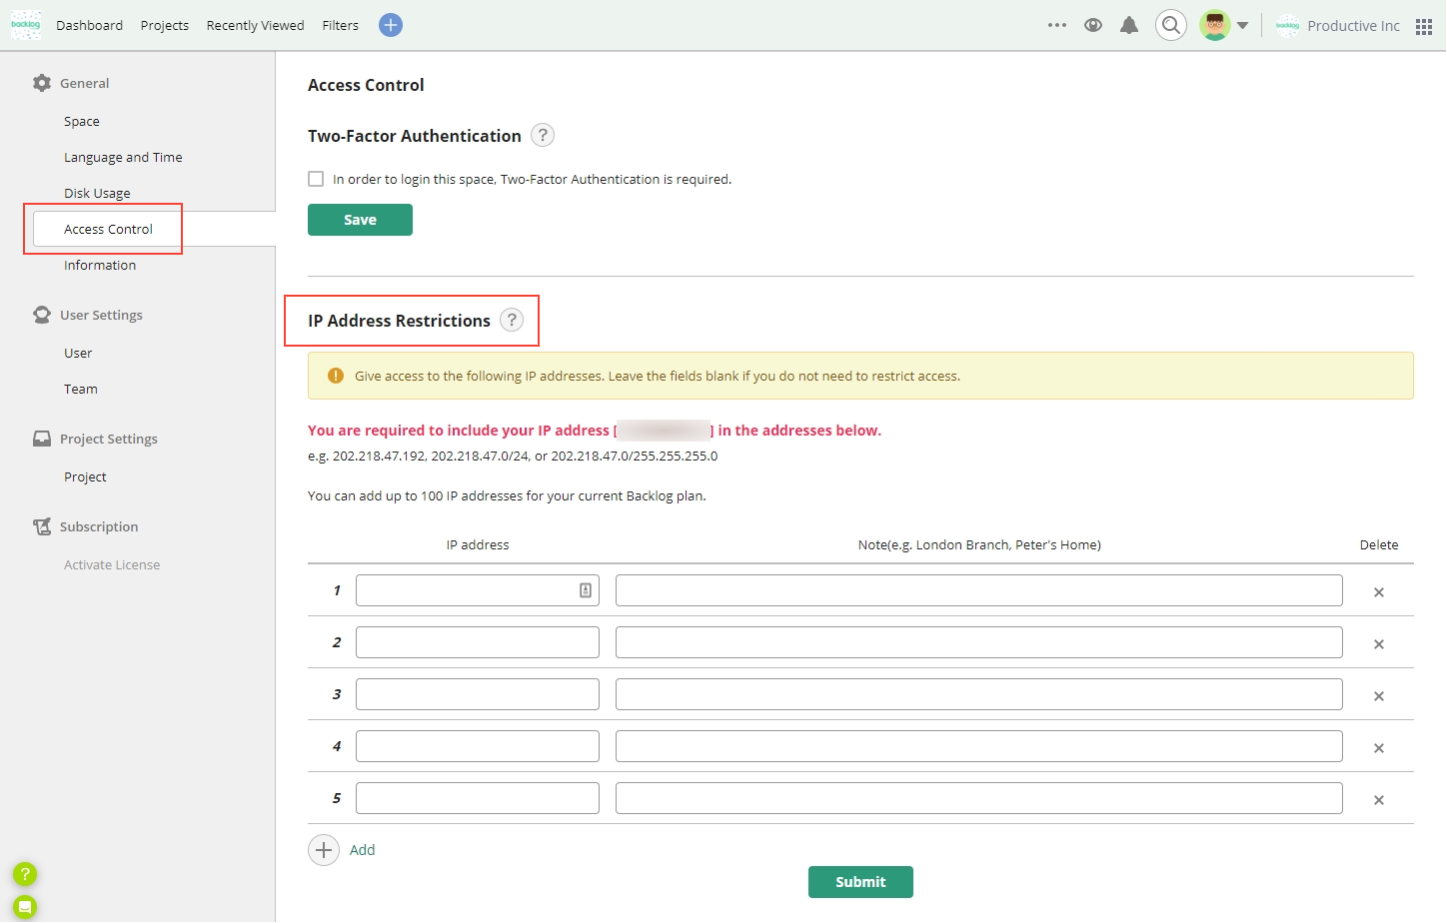
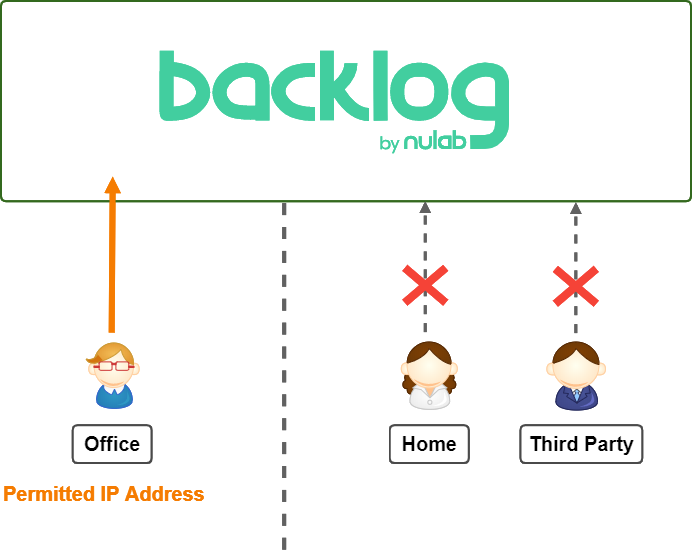
Pattern 3: Access control and IP address restrictions
Finally, we’ll introduce the IP address restrictions feature that you can use to restrict user IP addresses that can access Backlog.
For example, an organization may want its users to access projects from the office network and prevent access from home or other unsecured networks. In such cases, the Backlog Space can be set to only allow access to a list of permitted IP addresses.
The Access Control feature is available in Standard plans or higher. We recommend it as a way to prevent unauthorized access by third parties in advance.
In addition, 2FA login is available for all users (including free plans) and administrators can also enforce two-factor authentication (2FA) for all users (available for Premium plans and above). This requires all users to enter a 2FA code in order to log in.
| Scenario: | Limiting Backlog user access to permitted connection sources or networks, i.e. IP addresses. |
| Usage pattern / recommendation: | Use the Access Control setting, which can be found under Space settings; enter the permitted IP addresses into the allowlist. |
Conclusion
We’ve come to the end of this article on managing your projects securely. As a quick review, we covered the three basics of user privileges and the three patterns for applying information/project access
Be sure to keep this article in mind as you set up your projects and members, so together you can enjoy more collaboration and productivity in Backlog!

